
criggie.org.nz
| News | Images | MP3 | Humour | Email Us | Webmail | Links |
| Stuff from: | Debbie | Criggie | Daniel | Luke | Katherine | Gladys |
This document assumes the reader has a basic understanding of IP networking, subnets, the concept of routing and NAT.
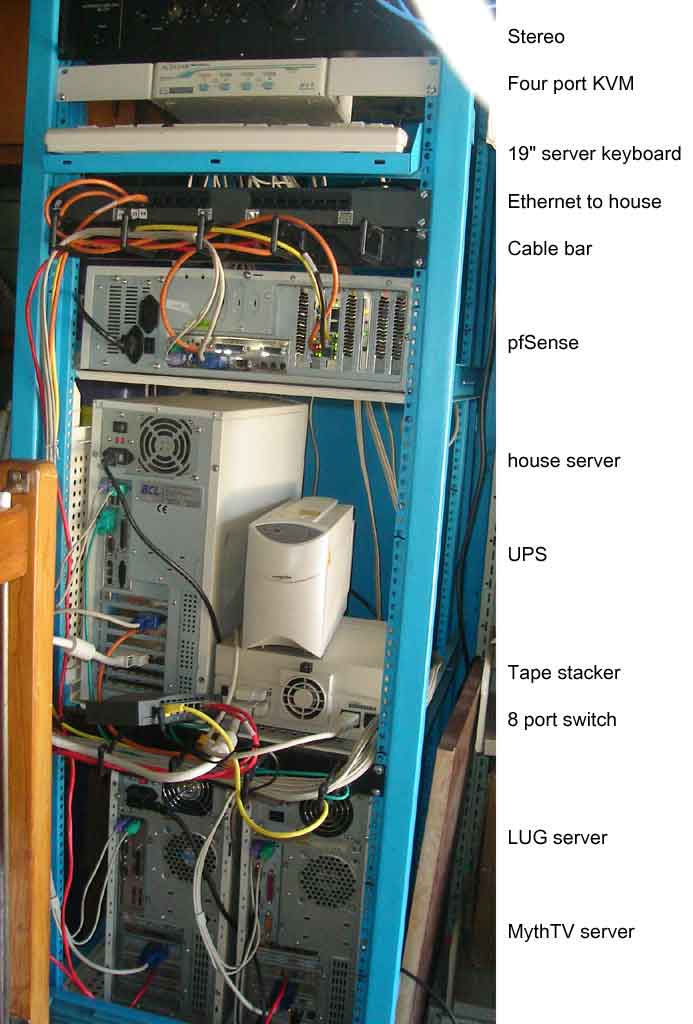
I'm using a celeron 433 machine with an intel BX board. There's a 256 Mb of SDRAM and a 256 Mb sandisk CF card in a cheap IDE/CF adapter. The CF card and adapter are the only parts I bought new. Everything else was either in my junk pile, or purchased used.
Network cards in my pfSense box:
Remember the minimum requirements for pfSense:
Download the latest ISO image and burn it to a CD. If you're using an older CDROM drive then remember some don't like CDRW, and some really old ones don't even like CDR.
Boot your CD then run through the installer. If you have a CF card then don't make a swap partition. Likewise, if you have 256 Mb ram, you could skip the swap partition too.
After installing, feel free to remove your CDROM drive. Future upgrades are done through the web GUI.
The first thing to do is to draw up a list of all your desired settings, then to put them into pfSense in a methodical order.
If you will only have a LAN and a WAN port then print out this table and complete it first. Otherwise if you have a more complex configutation then print out this table and complete it.
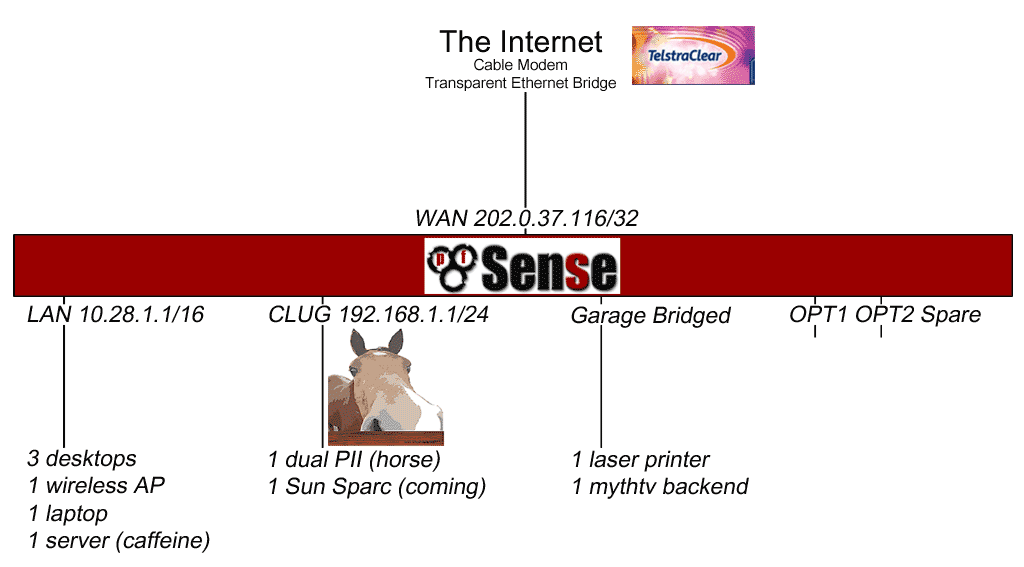
When you first boot your fresh pfSense install you get the option to choose a WAN port and a LAN port, then you give the LAN port an IP. (VLANs are not treated here- the author has no experience with VLANs.) Give an IP like 192.168.1.1 to the LAN port (or whatever you prefer.) Further configuration is done through the webGUI hence the need to give an IP now.
Next is to go to a client machine inside your LAN. The client should be configured with either DHCP if your pfsense box is running dhcpd, or a compatible static IP.
Browse to http://192.168.1.1/ (or whatever IP you used) and log in with the username admin and the password pfsense. The wizard will then ask you a bunch of questions relating to basic configuration. Go through it and enter appropriate values. Please change your admin password as soon as you get the chance.
A quick aside here... Aliases are a great way to make the configuration more extensible without having to update lots of rules. For example, a small site might host email on the same physical machine as the web server. But in the future, when the email server is a separate box either all rules and NAT entries need modifying, or one alias needs changing.
On the aliases page (Firewall -> Aliases) create an alias for every internal machine that will be the target of a NAT rule.
Also, if there are any network ranges that you will treat separately, create an alias for them here. For example, if you wish to accept MS RDP connections to work from a specific static IP (home) then make and use an alias, not a hard-coded IP.
At this point you should be able to browse the web from a client machine.
To methodically create all your NAT and rules entries, refer to the form you filled out earlier. For each service in your LAN that you want someone in the WAN (the internet) to access then create a NAT rule under Firewall -> NAT
Remember to tick "Auto-add a firewall rule to permit traffic through this NAT rule" at the bottom of the page. You can go edit the firewall rule later if necessary.
Once your LAN and WAN are completely configured, test them. It is advisable to get a port scan done from some other machine on the internet.
If you have more interfaces then things get a lot more complex. The author's network has a bridged interface (which is straight forward - turn on "Bridge With" under Interfaces -> OPTx. Presently you can only bridge two interfaces together.
When it doesn't work...
Back up your configuration before and after any major changes. Backups can be done on the Backup/Restore tag on the Diagnostics menu. A configuration is an XML file, and is often smaller than 16 kilobytes. Store it safely because your admin password is in there.
This file last modified Sunday November 06, 2005
If you find something here useful, feel free to donate bitcoin: Donations address: 14LHst9s1UEh8NMem87qaEd9tJWSCiNt1x