criggie.org.nz
| News | Images | MP3 | Humour | Email Us | Webmail | Links |
| Stuff from: | Debbie | Criggie | Daniel | Luke | Katherine | Gladys |
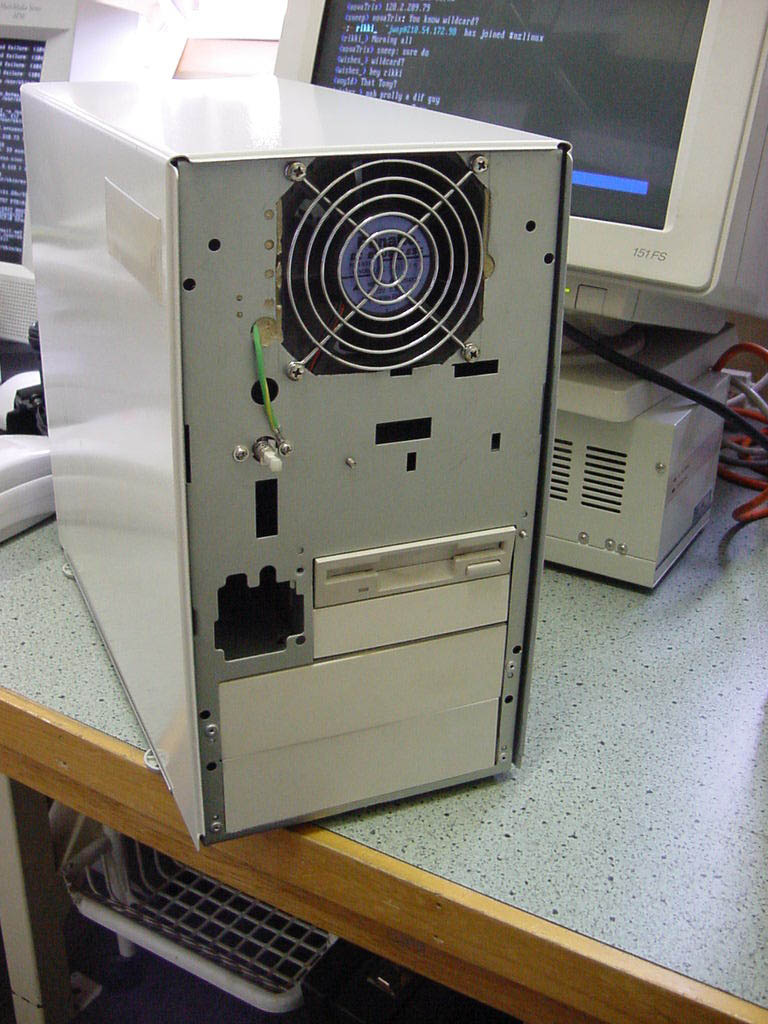
Firstly, I started with an old minitower AT case, which was a 2x 5.25" and 2x 3.5" size, with a 200 watt PSU.
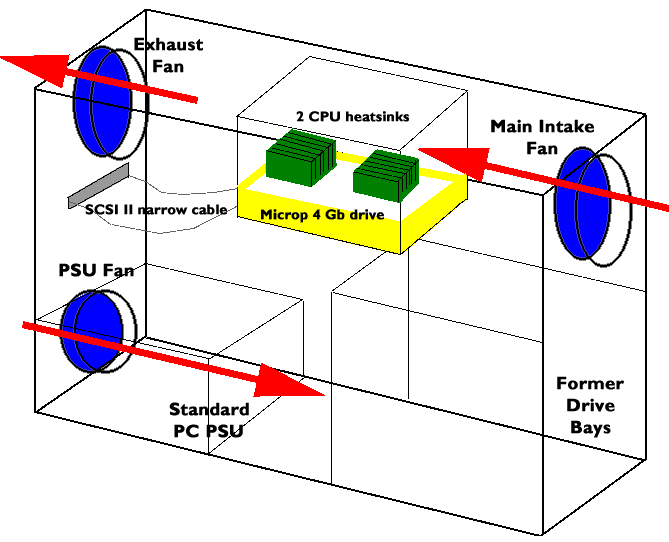
My first decision was to flip the whole case over, because thats what gave me the biggest open space at the top of the case. The main reason for wanting the hot drive up the top of the case was to get all the heat up into the wind-tunnel area and then move it out of the case.
To hold the drive in the wind stream I pillaged another drive bay support from another case, then pop-rivetted it to the underside of the ceiling.
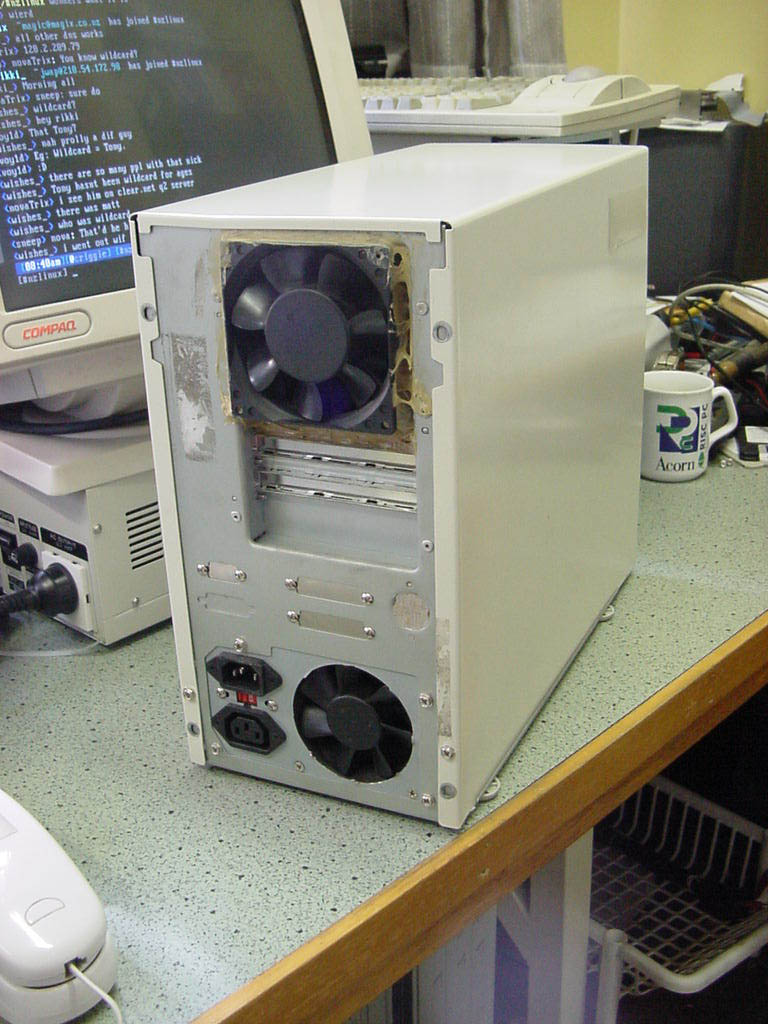
To connect the SCSI bus to the outside world I bought a short HD 50 to Centronics 50 SCSI cable for about $25, and salvaged a Centronics 50 / Narrow stub cable from an old external SCSI single bay enclosure. Purchasing that bit would have been about another $25. The socket has been mounted in the rear of the case.
Somewhere in here the plastic front got in the way, so I ripped it off. I never wanted the thing to look like an upside-down PC anyway.
Next came fitting all the fans. I had no hole-saw which was good for steel, and big enough for the job, so I bought a fine steel jigsaw blade and fitted that to my B&D jigsaw (who needs flash tools?) The front hole is an octagon, and the fan is bolted to the case at the four remaining corners. The rear fan is where the IO cards used to go, and is far messier (but its at the back, out of sight.) Needless to add, all the electronics were removed for this, and I gave it a good vaccuum afterwards.
The fans are then wired to the +5V line on the PSU using normal wire. I had used the +12V line, and the air movement was phenomenal, but so was the noise.
There was a significant amount of air leakage too. No PC case is airtight, but I covered the drive bays with blank bay plates, and covered most of the smaller holes with either Liquid Nails, or duct tape.
To help transfer the heat from the drive mechanism to the airflow I have fastened a couple of cheap CPU coolers to the top of the drive. I put a dab of heatsink paste in the middle of the contact, and a drop of 15 minute araldite in two corners for holding power. The fins are aligned so as to get airflow along their length.
Knowing that heat rises, and its easier to encourage and use such an effect, I also decided to flip the PSU's own internal fan. As you can see air is now drawn in the front and rear-bottom of the case, and exhausted out the back at the top.
Lastly, I attached four hard rubber feet to the bottom of the unit (basically just cos I could, had them spare, and to absorb minor shocks) and tapped four new holes on the rear of the case to screw the cover down with.
This file last modified Sunday January 23, 2005
If you find something here useful, feel free to donate bitcoin: Donations address: 14LHst9s1UEh8NMem87qaEd9tJWSCiNt1x